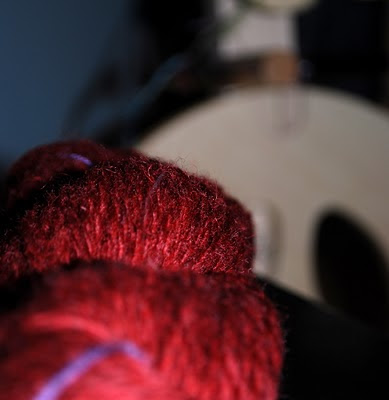
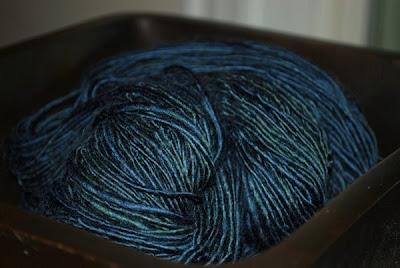
Mr. SockPixie's Moth Mittens are finished and just in time! It has been really cold here in Boston over the last few days.
To quickly recap the pattern came from the book All New Homespun Handknits by Amy Clarke Moore. I am happy they are finished, but a little sad too as I had so much fun knitting them. I might just have to spin some yarn to make another pair...
I have cast on for the Indian Floral Vest, and am getting ready to reknit the American Girl Doll Sweater. This should be a busy but really fun week, with lots of new knitting to share with you.
American Girl Doll Sweater continued...
First, I want to thank you for taking the time to give me suggestions for the yarn I should use to replace Matchmaker in my new American Girl Doll Sweater Pattern. It was wonderful to read all your comments. Most of you favored Palette, a KnitPicks yarn.
The first thing I did this morning was to order a skein of KnitPicks Palette in color Raspberry Heather.
Then I went to one of our yarn stores in Boston, A good Yarn to look for what I thought would also be a great choice Jamieson's Shetland Spindrift.
I got a couple skeins in the lovely Moorgrass colorway. (I have something for heathers at the moment!)
I think both the Knitpicks Palette and the Jamieson's Spindrift will work beautifully.
And since I was just too excited about the new pattern, I swatched with the Jamieson's.
This is going to be beautiful, don't you think?
American Girl Doll Sweater
I will be writing a pattern for the American Girl Doll Sweater. When I knit the sweater, I used Jaeger's 4 Ply Matchmaker which is no longer available.
I have spent some time this morning doing research on the possible replacements. I want to knit the sweater over again, and make any necessary changes in the pattern to accommodate the new yarn.
Here are my choices so far. (Ignore the colors.) I hope you will give me some feedback and if you have a suggestion I would really appreciate it.
Debbie Bliss Rialto 4 ply:
PLUS: very close in terms of gauge, machine washable, good stitch definition
MINUS: Limited color choice
Rowan 4 ply Scottish Tweed:
PLUS: Great color choices, interesting texture (but will it be too much?)
MINUS: Hand wash
Berroco Ultra Alpaca Fine:
PLUS: Machine washable, readily available, nice heathers
MINUS: A little finer gauge, will the fuzz hide the pattern?
Knitpicks Palette:
PLUS: Great Color choices, nice stitch definition, great price point
MINUS: a little too fine maybe, handwash
So what do you think?
Little Knitting...and American Girl Doll Sweater
Little knitting, as in knitting little things, has great merit. It is quick, and uses very little yarn. Instant knitting gratification! One of my favorite forms of "little knitting" is knitting for Little Miss SockPixie's American Girl Dolls.
This little sweater was inspired by a vintage pattern from the 1950s for young girls.
I like its simplicity and the delicate lace pattern along the front sides of the cardigan.
I love knitting doll sweaters with fine yarns. I had a ball left over of Matchmaker 4ply by Jaeger, in a perfect vintage garnet color.
I fiddled a bit, in particular with the button band. I wanted something that would sit flat, and not pull, so I chose a folded edge, knitted as you go, with a separating slipped stitch to create a clean fold. Picking the buttons was fun too. I wanted them to be really small to match the scale of the doll better.
This was fun! And the best part of it all, is that Little Miss SockPixie loves it! Let me know if you would like me to offer it as a pattern? (I would change the recommended yarn as Matchmaker is discontinued.)
Swatching
I worked on Mr. SockPixie's Moth Mittens last night, and then I knit a swatch with my newly spun red Shetland roving...Yum...I thought knitting the yarn would be bliss, and it definitely is.
My yarn is a little finer than the yarn called for in the pattern, and so I will be making some adjustments, but that's just part of the fun, isn't it?
I am off to finish the mittens. I might just be able to put in a few minutes of knitting before I teach French Conversation in the Brookline adult ed tonight. Tonight we are discussing campaign financing in France! There is nothing like the calming effect of knitting before discussing a hot topic like campaign financing!
Plying Brings Me One Step Closer to Knitting
I just finished plying the first skein of the red Shetland roving for the Floral Vest. I chose a simple worsted 2 ply .
I think the color is even more striking in its final form, the heathery tones just glow.
Knitting the vest is going to be pure bliss!
I think the color is even more striking in its final form, the heathery tones just glow.
Knitting the vest is going to be pure bliss!
Labels:
2 ply,
Heather,
Indian Floral Vest,
knitting,
plying,
Shetland,
SockPixie hand-dyed roving,
spinning
More Glove Knitting
I'm still working on the beginners glove knitting class-in-a-booklet that will be available next month. I'm surprised that I'm not repeating myself from my original glove knitting booklet. Apparently I can talk about glove knitting forever. I'm going to put the basic glove pattern in the booklet three times - once with the dpn version with all the photos, once with the 2 circ version with all the photos, and once the pithy version for when knitters get the general idea and want to speed things up.
The main work is dealing with all the zillions of photos I'm taking. I am very grateful for the macro setting on my digital camera (Canon PowerShot A470).
Here's a photo of the backwards loop cast on which is used for casting on stitches for the glove fingers.
The main work is dealing with all the zillions of photos I'm taking. I am very grateful for the macro setting on my digital camera (Canon PowerShot A470).
Here's a photo of the backwards loop cast on which is used for casting on stitches for the glove fingers.
I'm still trying to get a good close-up photo that shows when to increase on either side of the thumb gusset. It is so much less frustrating to learn to read your knitting so you don't have to count rows in between the gusset increases.
I'm not much of a football fan but I'm greatly anticipating the Super Bowl this year. I just read that the Puppy Bowl VI on Animal Planet will feature bunny cheerleaders from a rabbit rescue group in VA.
Spinning Progress
I finished Mr. SockPixie's first Moth Mittens, and started the second one last night.
Mr. SockPixie tried the first one on and it was a perfect fit!
Today will be for spinning. I am determined to make progress on the spinning of the red Shetland roving for the Indian Floral Vest.
One bobbin filled, many more to go!
Are you spinning with a special project in mind? I would love to hear about it.
Fairisle Moth Mittens
Yesterday, the children wanted to go to their favorite hangout, the bookstore, after we were done with school. (We are homeschoolers). Even though, my spinning wheel is a Louet Victoria, and I could just have packed it up and taken it to the bookstore to continue spinnning the roving for the Floral Vest, I decided not to, and instead chose the easy thing.
I picked 2 skeins of contrasting wool yarn, a blue and a green (rather masculine colors), with the idea of knitting mittens while at the bookstore.
During our last visit at the bookstore, a couple days ago, I had looked at the book, All New Homespun Handknit by Amy Clarke Moore and really liked some of the projects in it.
As soon as we got to the bookstore, I bought the book, and started working on the Moth Mittens.
I decided the mittens would be for Mr. SockPixie.
To make the mittens a little more masculine, I opted for a less adorned cuff. Just a two color K2 P2 rib would do for my rugged guy!
I kept the rest of the pattern as directed, except for the inside of the hand where I only knit the plain pattern without the central swirl.
I am almost done with the first mitten, just a few more rounds before the decreases!
If you bought the book, or have made these mittens leave me a comment and if you have a blog, I will go see yours.
Sweetheart Baby Slippers (free knitting pattern)
I was going to have the pattern for the Sweetheart baby slippers as a pdf, but my computer had to be completely reinstalled, and the software is not back on yet, so I will just post it to the blog.
Materials:
-Left over worsted weight handspun or commercial worsted weight yarn in 2 contrasting colors. (approx. 1 oz for light color, and 1/2 oz for the contrast or dark color).(I used left over handspun Romney).
-Set of US 5 dpts
-Darning needle
Gauge:
6 stitches per inch in garter stitch on US 5
Instructions:
Make 2 hearts using the dark color(DC).
Cast on 21 stitches.
R1: K9, Sl 1, K2TOG, PSSO, K6, K2TOG, TURN.
R2: Sl 1, K13, K2TOG, TURN.
R3: Sl 1, K5, Sl 1, K2TOG, PSSO, K3, K2TOG, TURN.
R4: Sl 1, K7, K2TOG, TURN.
R5: Sl 1, K2, Sl 1, K2TOG, PSSO, K1, K2TOG, TURN.
R6: Sl 1, K3, K2TOG, TURN.
Repeat R6 until there are 5 stitches left. BO loosely.
Continue as follows to knit the 2 slippers.
With the main color, in my case the lighter one (LC), pick up and knit 20 stitches. You will start picking up at the point where you ended your bind off, you will pick up 10 stitches down the first side of the heart on needle 1, and then 10 stitches back up the other side on needle 2, stopping at the point where you started your bind off, leaving the bound off stitches unused. On needle 3, cast on 20 stitches using the knitted cast on.
Join the round, start with a purl row, then knit in garter stitch until you have six ridges (6 ridges = 12 rows).(To get garter stitch while knitting in the round, you will knit one row, then purl the next).
Break LC, now using DC, purl 1 row.
Next row: K5, K2TOG, K1, K2TOG, K2TOG, K1, K2TOG, K10, K2TOG, K1, K2TOG, K2TOG, K1, K2TOG, K5.
Purl 1 row.
Next row: K5, K2TOG, K2, K2TOG, K10, K2TOG, K2, K2TOG, K5.
Purl 1 row.
Next row: K4, K2TOG, K2, K2TOG, K8, K2TOG, K2, K2TOG, K4.
Purl 1 row.
Next row: K3, K2TOG, K2, K2TOG, K6, K2TOG, K2, K2TOG, K3. (20 stitches)
Purl next 5 stitches.
Use a 3 needle bind off to close the sole of the slipper.
Place 10 stitches on one needle and 10 on another needle. The needles will be on each side of the point of the heart. Using a third needle, bind off loosely. Turn the slipper inside out. The wrong side is now the right side. Weave in all ends.
With LC, starting at the center of the back of the slipper, pick up and knit 2 stitches at the edge of the slipper, *BO 1, pick up 1*. Repeat along the foot opening until you are back where you started ending with BO of the last 2 stitches. Weave in ends.
Happy knitting!
Sweetheart Baby Slippers
A little more shetland, a little left over handspun, and a little more knitting... Here are my Sweethearts, my latest baby slippers inspired by EZ's heart bonnet!
Just think about it, this is the perfect project for left over handspun, or not handspun worsted weight yarn walnuts!
My hope is to have a pdf of the free pattern ready by tomorrow evening.That's it for now, got to go...
Just think about it, this is the perfect project for left over handspun, or not handspun worsted weight yarn walnuts!
My hope is to have a pdf of the free pattern ready by tomorrow evening.That's it for now, got to go...
Still Slugging Along
Ravelry has put in a neat feature HERE where you can search on patterns for sale that benefit the Haiti earthquake victims. I hope to spend some quality time soon and look through the 59 pages of offerings from generous designers.
I've had gauge issues on my last four projects which has significantly slowed down my progress. I'm currently working on the Drops Socks for the Ravelry Stranded forum KAL, an alpaca hat for DH, and a pair of plain gloves. I plan to photograph the gloves in detail while knitting them to make a booklet for brand new glove knitters who would like to see the entire process using dpns or 2 circs.
My three booklets (Stranded Color Knitting, Glove Knitting, and Mittens in Color) are finally available in print wholesale. If you are teaching a class, have a guild, run a yarn store, or want some booklets for a knitting conference, email me at nanetteblanchard (at) earthlink (dot) net and I'll set you up. It is a pretty simple process - I'll give you a link to the book at the CreateSpace estore and a discount code and you can figure out how many you'd like to order. The same discount code will work for all of the books and can be used multiple times if you want to re-order more books.
Also, all my technique booklets are in the process of being added to Patternfish along with my patterns. If you are a designer, I highly recommend working with Julia at Patternfish. She really is a wonderful lady.
I was in Santa Fe again this weekend and I took more photos of St. Francis Cathedral/Basilica. I've been to a lot of great churches including Notre Dame and Sainte-Chapelle in Paris but St. Francis in Santa Fe is still my favorite.
The recent restoration of the church was so well done - painters laboriously re-painted all the lovely trim.
I love looking at all the colors in the beautiful stonework - according to the church's Wikipedia page it is yellow limestone from Lamy, NM. Most of the stained glass windows were imported from France.
Done!
I am happy to tell you that I was very good yesterday! I finished Mr. SockPixie's Shetland socks. Mark Twain was right, the best way to deal with temptation is to yield to it.
I yielded, I spun some of the delicious red roving, and then satisfied, finished the socks!
To recap the socks were made from my handspun, 2 ply, light worsted Shetland in a natural chocolate color, and some left over handspun 2 ply Romney (a left over from the EZ's mitered Mittens) also a light worsted. The socks were knit on US 5 dpts.
There are really no words to tell you how much I enjoyed the whole process of spinning the yarn, and then knitting the socks. Complete is maybe the word that comes to mind. That's it, the experience felt complete...even if I do not...yet... raise the sheep that will produce the fiber, that I will spin, to make the yarn, that I will knit into garments, that my loves will wear...
Tempted to Spin
I was resolved yesterday to finish Mr. SockPixie's socks before starting to spin the delicious red roving for the Indian Floral Vest... The best I can say is I tried...
In my defense I will say that I turned the heel on the second sock. That counts as a good effort right? But there was all this Shetland fiber sitting there next to me, tempting me...
So there, I started spinning, but only a little bit...
I have a perfectly rational explanation, I needed to spin to get going on my swatches, so that I could start spinning the yarn for the vest as soon as the socks were done, and... like the great Mark Twain, I deal with temptation by yielding to it! There!
More Shetland Spinning
A few posts ago, I said that I would continue spinning some Shetland before I moved on to another breed of sheep. My plan had originally been to spin more of the deep natural chocolate color, some of the butterscotch color, and to knit a fair-isle project.
You know what happens to good plans? They get changed!One day, I was just browsing the Interweave Knits website, and in their pattern store found this pattern. The SockPixie girls were sitting in my room next to me, and as they saw the vest, the room filled with oohs and aahs!
This pattern called the Indian Floral Vest was designed by Pam Allen and published in the Winter 1999 Interweave Knits magazine.
I have not been dyeing yarn lately (I will explain later). But at that very moment, the urge to dye was too strong. I rushed downstairs, grabbed the pots, some yellow and some red...I stood next to the pot, staring at the roving, but not stirring for fear of felting... the color gradually saturating the already deep butterscotch.
I only pulled it out when I was sure the color even after drying would be like a jewel.
The color exceeds my expectations. The butterscotch undertones give a unique glow to the red... I could go on and on, but I'll keep it short: "ooh...aah!"
I can hardly wait to start spinning. Of course I will have to test spin a little, to get the best yarn possible for the project.
This means I must hurry and finish knitting Mr. SockPixie's Shetland Socks before I get all wrapped up in this new adventure.
Haiti
The thoughts and prayers of the SockPixie family go to the people of Haiti. Please join us in supporting the relief efforts of Doctors Without Borders.
Romney Mitered Mittens
The Romney Mitts are finished and already claimed by little Miss SockPixie! I know that they will be well used and appreciated here in Boston.
To recap,I spun the light worsted 2 ply yarn from a natural silver colored Romney roving. The spinning was done from the fold using a short forward draw on my Louet Victoria spinning wheel.
I used Elizabeth Zimmerman's Mitered Mittens from her great little book the Knitter's Almanac.
The miters are a wonderful way to make really simple mittens look very attractive. Knitting the miters takes no more concentration than back and forth knitting. EZ's mittens are the perfect, relaxed, quick winter project!
I knit the mittens thumbless, following Elizabeth Zimmerman's advice, and inspired by her "unvention" did the thumb trick .(Follow the link to find pictures of the thumb trick process.)
Now I just need to knit a pair for myself so that I may take part in my family's snow ball fights!
EZ Thumb Trick
I finally took the time to work the magical trick Elizabeth Zimmermann "unvented" to make thumbs into mittens after the fact.
The great thing about the trick is that you just knit the mittens kind of thoughtlessly, without worrying about a thumb, and only add it once you are finished with the knitting of the body of the mitten. You do not even need to hold a few stitches with a waste yarn! All you need to do the trick are the mittens, scissors, your DPTs, and strong nerves if you are thumb trick virgin!
Place the hand of the recipient in the mitten and ask them to bend their thumb. With one of you DPTS lift a stitch where the thumb bends, roughly in the middle of the joint in order to mark it. The recipient can remove their hand.
Next, with sharp scissors, and after having taken a deep breath, snip the marked stitch.
Next, using a DPT gently pull the cut yarn through, releasing live stitches on the left and on the right of the snipped stitch.
I like to use the DPT, as it exerts less pull on the fabric, and seems to minimize the risk of loosing stitches.
The total number of live stitches you need to release will depend on your gauge, and the size of the hands of the recipient.(I released a total of 10.)
Take a first DPT and insert it through 1/2 of the released stitches, with a second DPT, pick up and knit 3 stitches , place about 1/2 of the remaining live stitches on the same needle, then on the 3rd DPT, place the last of the live stitches, and then pick up and knit 3 stitches.
You are all set to start knitting the thumb, just join the yarn, and knit away!
I hope this will inspire you to try knitting mittens the EZ way!
A Fern Beret for Miss SockPixie
A few weeks ago, I posted a picture of some handspun, a Merino Silk blend. I spun the yarn as a light worsted singles using a short forward draw. The result was a yarn with very little fuzz, great shine, and body.
I had about 4 oz of yarn which left me if two choices: mittens, or a hat. I thought the yarn would be to feminine for a boy, and its "crispness" would allow for stitch play.
Berets are great to show off a stitch pattern as they have a large section that sits in a disc fashion on the head, whitout being stretched or distorted.
I picked a lace pattern that radiates toward the center of the beret, it actually reminds me of ferns. I blocked the beret gently to open up the lace. I love the color, the slight silky luster, and the timelessness of the style.
The beret is now Miss SockPixie's.
A Happy Husband...
A happy husband is ... a husband dressed in a Finn hand-dyed, handspun and handknit hat and a shetland handspun and handknit scarf!
I tell you, I love spinning and knitting for him. His happy smiles when he receives my gifts make my day!
The Shetland Sheep
As you know, I recently read the book In Sheep's Clothing, and gave myself the crazy goal to try and spin from as many sheep breeds as I can. The more I think about about it, the more I love it. With each fiber, there is a new experience, exploring, and learning about a breed and sharing my experiences with you.
The socks for Mr. SockPixie are growing, and I am hoping to make great progress today.
My Romney Mitts are still awaiting their thumbs. ( I have work to do today!)
I have spent a little bit of time reading about the Shetland sheep. The Shetland sheep as its name indicates is from the Shetland Islands. The Sheltand sheep is part of the Northern European short-tailed breeds.Today's Shetland sheep, is pretty much the same as its early ancestors. The only real difference, is that the sheep are raised on the Shetland islands, and throughout the UK, as well as Canada and the US, which I am sure EZ would object to, as Shetland should only come from the Shetland Islands! What makes the Shetland sheep fiber really attractive is that apart from its silky hand, it comes in an incredible array of natural colors. If you want to knit fair-isle projects from handspun yarn, Shetland fiber is the answer. Or if fair-isle is not your cup of tea, you can just create the most amzing marled yarns by plying different colored singles together!
Just look at these colorful little guys!
I am going to spin a little more Shetland before I try another breed of sheep, because look what I have...
Chocolate and butterschotch... a fair-isle beret perhaps... and why not a couple skeins of marled yarn for another manly project?
Thumb Repair
For some reason most of the men in my life enjoy giving me ratty old knitted items to repair. I don't knit socks for DH and his friends anymore but they still produce various pairs of damaged
mittens and gloves. The pop-up mittens today weren't even handknit but DH asked me to fix the thumb. He has recently started using trekking poles for his hiking and backpacking which caused the hole.
The very first thing I do is handwash the item in question. These mittens have what looks like wood stain on them which didn't go away. Then I estimated on the gauge and needle size and chose some Elann Sock it to Me yarn and size 2 (US) dpns. I like using a yarn with a bit of nylon for this purpose to help the repairs last longer.
I cut off the tip of the thumb and ripped back to a point where the yarn was no longer thin. I put the sts on the needles and started knitting. To determine how long to make the thumb, normally I'd count the rows but my gauge was a bit finer so I added a few rows. The original mitten thumb looked like it was just a few rows of K2TOG for the thumb tip decreases so that is what I did as well.
I'm not sure if this will be a recurring problem but if it is the next time I repair them I might add some duplicate stitch to the area that is prone to holes to help the thumb last longer.
Subscribe to:
Posts (Atom)