Intarsia, Part Two

INTARSIA, PART TWO

Before I start talking about how to knit intarsia, I want to emphasize that the method I'm showing is from the book Intarsia: A Workshop for Machine and Hand Knitting by Sherry and Keely Stuever. There are actually several ways of doing intarsia; from what I can tell Kaffe Fassett
endorses more of a free spirited approach where sometimes colors are stranded instead of interlocked and the millions of yarn ends are worked more like you would in stranded color knitting. I think the Stuever method produces more even stitches and the reverse of the work is much
neater looking.

It is important to remember that to knit intarsia flat you have to read the chart from two different directions depending on what row you're on. The right side of the knitting is worked by reading the chart from right to left and the wrong side of the knitting is worked by reading the chart from the left to the right. Some knitters do intarsia by knitting back backwards to avoid having to purl and read the chart from both directions but I
actually like working the wrong side as it is easier to see which yarns to grab every time I get to an interlock.

Another important point is that every time you get to a new block of color, you start a new yarn supply. If you are knitting a vertical line in black on white background, you will have two white yarn supplies on each side of the black line. As I said in my last post, I simply cut about 2-3 yards of each color for each yarn supply and let it hang loose on the back of the work and pull each color loose out of the tangle of yarns when I need it.

To start a new color yarn you simply lay the yarn end on the front or right side of the work (whether or not you are working the right or wrong side of the project). Bring the old yarn OVER the new yarn and start knitting with the new yarn. Ignore the tail until you get to the next row.


Here you can see I added the blue yarn on the previous row and I'm to the point where I added the second blue yarn. You can see the tail under my thumb on the right side of the work.


Here on the reverse side of the work I've pulled the blue yarn tail to the back of the work right through the center of the two needles. The blue yarn is now connected to the work and you don't have to worry about holes.


Each and every time in intarsia you get to a color change you have to do an interlock. The new color you're beginning to knit with always comes UNDER and to the RIGHT of the old color. In the photo above I'm about to start purling with the green so the green yarn has been pulled under and to the right of the blue yarn.


After I knit the green I need to find the right blue yarn on the back of the work to interlock with the green. This can be complicated with the yarn tails and more than one section of the same color so I turn the work around to figure it out.

That's pretty much it - I've shown a method to add new yarns and a method to interlock the yarns at every color change. Next week I'll show how to deal with all the yarn ends.
INTARSIA, PART ONE


Intarsia allows you to do absolutely anything you like with yarns and colors - virtually anything that can be charted can be done in intarsia. You can do intricate pictures, abstract art with hundreds of colors, a simple baby blanket with teddy bears and alphabets, or some traditional argyle socks. While stranded color knitting (where you carry two or more colors per row) does have some limitations on length of floats and numbers of colors you can use per row, intarsia (where you only carry one yarn at a time) is truly no-holds-barred fearless knitting.

So if it is so great why isn't intarsia more popular? Probably because of this:


In intarsia every single time you come to a color change, you twist the yarns (called an interlock) and start knitting with the new color. Therefore the old color just sits there at the back of the work. In the photo here (a simple intarsia sock pattern from Sweaterscapes) there are really only a few color changes but you can see the extent of the yarns tangling on the back.

There are three methods of dealing with all these yarns at the back of the work - yarn bobbins, yarn butterflies, or just cutting 2-3 yard lengths and leaving it all at the back of the work. The method you choose will be determined by which thing bothers you most - tangling yarns at the back of the work or dealing with even more yarn ends than are already created in intarsia. I use the third method because I hate tangling and I actually like dealing with ends.
I think another reason knitters shy away from intarsia is that it can require quite a few judgment calls. There are times when you might mix intarsia, stranded color knitting, and duplicate stitch in one project for a complex chart. There are also several ways to work in the millions of yarn ends so it is best to get some resources on the subject.

Kaffe Fassett is the king of intarsia knitting. He's written many books with many gorgeous and inspiring knitting projects. I own Glorious Color, Glorious Knits, and Kaffe Fassett's Pattern Library. While I think his amazing color sense matches Alice Starmore's his books do not talk much about technique. For technique I always recommend the little self-published book, Intarsia: A Workshop for Machine and Hand Knitting by Sherry and Keely Stuever of Sealed with a Kiss. It is quite inexpensive and available at Elann among other places. It has photos and diagrams and a sampler block and it also discusses duplicate stitch which can help quite a bit in intarsia knitting.

If you're interested in trying intarsia, I highly recommend grabbing the Stuever book and buying one of Kaffe Fassett's books (many are available used or remaindered in discount book stores). Sweaterscapes , Swakknit and NeedleBeetle offer some fun intarsia patterns. Finally, HERE is a free intarsia pillow pattern from Kaffe Fassett.

Mondays... They can be so exciting...

I knew this Monday morning would be exciting.


I knew it would be exciting to pack all your Tartan Yarns.


I knew it would be exciting to think about next week's colorways.


But you know, the most exciting thing, I did not even know would happen. My neighbors and friends, adopted a little baby boy today, and he is coming home with them.
I am so happy I will be meeting him soon. And now I have the perfect excuse to knit zillions of baby things!
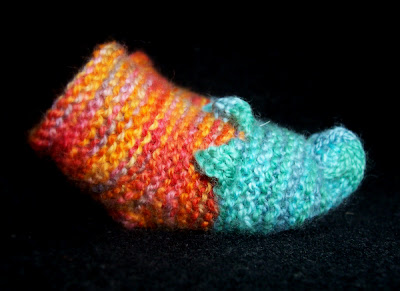
As a welcome home gift, he is getting a pair of Magic Slippers. What will I knit for him next? ...There is nothing like dreaming up new designs!

SockPixie's Sunday Update... Tartans, and Vegan


This week we are traveling to Scotland and Ireland. I got my inspiration from some of the most beautiful fabrics, tartans. The colors were fun to work with as they were so different from the ones I previously worked with. I would describe the colors as saturated, deep, vibrant. The colorway above is called Anderson.


Also this week I have added a great new yarn which I called Vegan. It is a cotton/lycra sock yarn, in a true fingering weight. The yarn looks wavy in the skein, it takes the colors beautifully, and has the loveliest texture when knit. I had been looking for a long time for a suitable yarn. Vegan will be wonderful for knitters with wool allergies, and of course for summer socks!

I hope you will join me on SockPixie for a little trip to Scotland and Ireland.

Night Breeze Socks

I'm running behind this week but I've managed to finish one pair of socks. I call these floral socks the Night Breeze Socks after a variety of African Violet. I used Palette in Black, Lilac, and Grass and subsequently learned that Knitpicks' is apparently discontinuing both Lilac and Grass so those colors are now on clearance.


I am delaying Intarsia Week until next week. I plan to include lots of resources and links on the first day, how to do the interlocks (ie. twisting the yarns between colors) on the second day, and how to deal with all the yarn ends on the final day.

Also, I just cut a check to the Colorado House Rabbit Society for $292.78 from my first quarterly Lulu check. As with last year I will try to donate at least $1000 from pattern sales in 2008 to help with all the pet rabbits in their shelter.

Anniversary...


My marriage anniversary is coming in April. I decided to make something really special for my husband, an anniversary quilt. I picked the colors that speak the most to me. I always seem to gravitate toward oranges. They used to be my favorite childhood color, but beyond that they are life and happiness to me. Here is the first picture of the first panel of the quilt.

A Sunday in Provence...


I am sitting at may desk, listening to the musics from the Amelie movie, dreaming of a Sunday in Provence. This weeks SockPixie colorways are truly dreamlike, and feel so much like home to me. There is the sun of Provence, the cicadas singing, the wind rustling in the olive branches, the smell of the fruits, and the ever present ocean...
Above is a picture of a colorway called St Jean de Luz. All the passion of provence seems to come to life in it.
I hope you will enjoy your Sunday in Provence!

This Week's Inspiration... A Sunday in Provence


You know I like winter. I jump up and down in pure bliss at the sight of a snow flake. But somehow, I have been dreaming of only sunny colors. So this week I am taking you to Provence. My colorways will be inspired by the beautiful, colorful fabrics that come from one of the most beautiful regions of France. The picture above, is one of a traditional pattern called Valensole. Even the names shine!
I hope you will join me for a Sunday in Provence.
Here are my new mannequins that I purchased from Manne-King. I was most excited about the women's hands but the ones I chose are actually too narrow to show adult women's gloves well. They are extra long so they will display gauntlet cuffs and they'll work fine for mittens.


The head is probably my favorite and the small hand on the far left was on sale - it is a men's hand and is frighteningly close to the same size as DH's hand.


Bubbles seems to think the camera is her Valentine's Day treat. HAPPY VALENTINE'S DAY!

A few Extra Skeins

I do not know how this happened but I made an inventory error, and I have 5 skeins left of this week's chintz colorways. They are in the Merino sock. I have 1 of each of the following colorways: English Roses, Merigold, Staffordshire, Lady Chatterley, and Royal Rose. I have updated the website.
I am sure this will make some of you very happy as these were some of this week's favorites.

Color Knitting Quiz

COLOR KNITTING QUIZ

I dislike showing progress photos so while I finish up the three pairs of socks I'm knitting I thought I'd post a quiz. Try it out to see how much you know about color knitting. Keep score and scroll down to the bottom of the post for the answers.

1. In the photo below, which color will be dominant or more noticeable?

A. Black
B. Purple
C. Both colors will be dominant.
D. Who cares? Colors shouldn't be dominant; they should be passive.


2. What is this type of colorwork (photo below is of reverse of work) called?

A. Stranded Color Knitting
B. Fair Isle Knitting
C. Intarsia
D. Medieval Eastern Estonian Color Knitting


3. How many different ways are there to hold the yarns for stranded color knitting?

A. THERE IS ONLY ONE RIGHT WAY. The lady at the LYS insists this is true.
B. Two
C. At least three with many more variations on those methods.
D. I'm pretty sure the way I hold the yarns is the wrong way.

4. What is it called when a long loop on the back of stranded color knitting is purposely caught on the back of the work?

A. Floating
B. Spinning
C. Weaving
D. Looping the loop

5. What is the difference between Fair Isle Knitting and Norwegian Knitting?

A. Fair Isle can be any kind of color knitting at all - all the knitting books say so.
B. Norwegian knitting uses a strand of yarn in each hand.
C. Fair Isle only uses two colors per row and doesn't usually have long floats.
D. Norwegian Knitting is much thicker because it is so freaking cold there.

6. What is this wacky gadget seen below called?

A. Scandinavian Cat Toy
B. Strickfingerhut
C. Tvaandstickning
D. Dubbelmossa


7. What is the Philosopher's Wool method of stranded color knitting?

A. It involves thinking deep thoughts about the meaning of life while knitting.
B. It involves using two colors per row in bright colors.
C. It involves catching the floats more frequently on the back of the work.
D. It is exactly the same as any other stranded color knitting.

EXTRA CREDIT QUESTION -

8. Who designed this colorful sweater?


x

x

x

x

x

x

x


ANSWERS:

1. A. Look nearest the needle- the black strand is BELOW the purple which will make it dominant.
2. C
3. C
4. C
5. C. Deduct a point from your score if you guessed A.
6. B
7. C
8. Kaffe Fassett's incredible Foolish Virgins sweater

SCORING - If you scored 1-4 points you're well on your way to being a color knitting addict. If you scored 5-7 points, you know more about color knitting than most knitting magazines. If you scored 8 points - congratulations! You're a color pro!

Munchkin Slippers Free Pattern


A few days ago, I mentioned a new project for yarn walnuts. Here it is. It is perfect for really small walnuts, as you play with 2 colors. There are no seams, and the slippers are knit in the round from the bottom up. It takes one evening for a pair. Once you've knit the first slipper, the second one will be a breeze. The result is just darling. I really like their whimsical spirit!Perfect for a newborn!( The pattern is sized for newborn.)
You can do what I do. For every pair of socks knit a pair of baby slippers for donation!


Munchkin Slippers


Materials: 2 walnuts of left over sock yarn. I am using left over
SockPixie Merino Sock yarn.
Needles: 2 16" US 1
Gauge: 7 1/2 sts/inch in garter stitch.


Cast on 5 stitches with one color. Knit a 2 inch i-cord.
Keep stitches on needle, turn work, and knit front and back of every stitch. You will have 10 stitches.
Split the stitches, 5 on each circular needle. Join round by transfering the 1rst stitch on right needle to left needle and the now second stitch on left needle over to right needle. Needle 1 holds the top of the foot. Needle 2 holds the bottom.
Knit 1 round, purl 1 round.

Increase the size of the foot by following the next 2 rows:
Increase round: K1f&b knit to last 2 stitches on needle, k1f&b, K1. Repeat on needle 2.
Next round:Purl
Repeat these 2 rounds until there are 13 stitches on each needle. Continue increasing on needle 1 only until you have 17 stitches, but do not increase any more on needle 2 (13 stitches), just knit even in garter.

Once increases are done, continue even in garter stitch until the foot measures 1 1/2" from the beginning of the foot (not counting i-cord.)
Finish with a knit row. Insert a piece of contrasting yarn through the stitches on needle 1.
Purl one round.

Work edge in st st for top of foot as follows:
Petal 1: K6, turn/ P6, turn/ K1,2TOG, SSK, K1, turn/Purl, turn/ K1, K2TOG, K1, turn/ purl,turn/ K3TOG, break yarn and stop section.
Petal 2: Reattach yarn, K5, turn/ K1, SL1, K2,Pass the slipped stitch over the 2 knit stitches, K1, turn/Purl, turn/ K1, K2TOG, K1, turn/Purl, turn/K3TOG, break yarn and stop section.
Petal 3: Proceed as for petal one.

With needle, pick up the 17 stitches held on the waste yarn, and with contrast yarn start knitting around in garter, starting with a knit round.
Knit a total of 10 rounds in garter stitch, Purl 2 tog at center of stitches on needle 2 during last purl row.

Shape heel as follows: Work on back stitches only.
R1: Knit to the last 2 stitches, wyif slip next stitch, bring yarn to back, turn
R2: Sl stitch, Bring yarn to the back, knit to the last 2 stitches, wyif slip next stitch, Bring yarn back, turn.

R3: Sl 1rst stitch, bring yarn to back, Knit to 1 stitch before the last wrapped stitch, wrap the stitch as above, turn.

R4
: Sl 1rst stitch, bring yarn to back, knit to 1 stitch before last wrapped stitch, wrap stitch as above, turn.

Repeat R3 and R4 until 4 stitches remain unwrapped at the center of your heel.

Continue shaping the heel as follows:

R1: Sl 1rst stitch, bring yarn back, knit to the wrapped stitch, knit the wrap together with the stich, and wrap the next stitch by wyif slipping the next stitch, bringing the yarn to the back turn.

R2
: Sl 1rst stitch, bring yarn back, knit to the wrapped stitch, knit stich an wrap together , wrap the next stitch by wyif slipping the next stitch, bringing the yarn to the back turn.

R3:Sl1 1rst stitch, bring yarn back, knit to the wrapped stitch, slip wrapped stitch to right needle, with left needle pick up the 2 wraps, and place the on the right needle. Slip the 2 wraps and the stitch back to the left needle, and knit the 3 together. Wrap next stitch as above, and turn.

R4: Sl1 1rst stitch, bring yarn back, knit to the wrapped stitch, slip wrapped stitch to right needle, with left needle pick up the 2 wraps, and place the on the right needle. Slip the 2 wraps and the stitch back to the left needle, and knit the 3 together. Wrap next stitch as above, and turn.

Repeat R3 and R4 until all stitches are consumed. The first and the last stitch on the needle will each have 1 wrap, which you will knit together on the first round of the rest of the slipper. Knit the rest of the round with B picking up the remaining wraps. You are now ready to continue the slipper.


Start knitting in the round again in garter stitch.

Knit in garter for 1 1/2". Knit in st st for 1/2". BO loosely.

Sew I-cord into a roll and attach it high up on body of slippers. Using the threads at the end of the petals attach them to the body of the slipper right above ridge number 3.
Weave in all ends. Make a second identical slipper.


This pattern is for personal use only, and may not be used for commercial purposes. Copyright 2008, Caroline Dlugy-Hegwer.

Sunday's Preview


It is time for the SockPixie Sunday colorway preview . I am really happy with the way the colorways turned out. I had fun designing them. They are so different from last week's colorways, yet they are equally refreshing, just slightly more passionate maybe. I actually could not help calling one of them Lady Chatterley!
These colorways gave me a great opportunity to pull out all my chintz dishes, and look at them, and touch them, and think maybe I should get more plates!

Above is a picture of a colorway I called Staffordshire after the famous English company who designed this pattern.
Isn't that blue background breathtaking?
I am off to finish my updates for the website, and will be posting the Chintz colorways up by 6 p.m. tonight.
I hope you enjoy this Sunday's colorways, and Happy Knitting to all!

Inspiration and Adventures

I did not have a minute to post to the blog this week!

There were many wonderful things, like reading all your lovely comments about the Magic Slippers. Thank you so much for your appreciation. I am very touched.

There were nice things like packing all your yarns, picking the ribbons to close the little clear bags the skeins are shipped in, and walking to the post office to send them to you.

There was sitting in bed thinking of this Sunday's colorways. That was fun, but I will come back to that.

There was designing a new project for yarn walnuts, but that will be the subject of another post.

Then there was that storm. Oh, that storm! It rained torrents. The wind was the maddest I have ever heard. I would have had a great night nonetheless, if it hadn't been for being woken up at 1 am to the music of dripping drops falling through my bedroom ceiling! That crazy wind had teamed up with the torrent to find the smallest gap in the roof. We did not loose our cool. We pulled pots out, set them down in a very strategic fashion considering the hour, and went back to bed. My husband went right back to sleep. I however sat there, counting the drops. "one, two, three..." "Stop it Caroline!" "...225, 226..."
I did not sleep a wink!


The good thing is that I can count and think of colorways at the same time!
I have two passions, knitting, and chintz China. I have over time collected many plates, tea cups, and saucers. The floral patterns delight me, and I am particularly fond of the ones set against colored backgrounds, in particular the ones set against black backgrounds.
I find the contrast dramatic, the colors so vibrant. This is what I have been playing with this week, for my new colorways. I will be posting a preview of this week's colorways tomorrow...

For the time being, Happy Knitting to all!
I just bought myself some fun head and hand mannequins to display knitted items. I'll show them off tomorrow if DH remembers to bring home batteries for the camera.

For those who are in the Albuquerque area, we're having another of our popular Adoptathons this weekend. On February 9, 2008 come check out our affectionate, litter-trained, spayed and neutered house rabbits available for adoption or just stop by to talk to some knowledgeable bunny people. This is the place to get all your house rabbit questions answered! The Adoptathon celebrates Adopt a Rescued Rabbit Month and will be held at the Petco on 10700 Lomas NE between 11 am and 2 pm.

Several breeds and sizes are available this time - there is an angora, a super soft Rex, and many baby bunnies. Personally I think Amy (seen below) seems to have the right bunny attitude.


I have an unprecedented three pairs of socks on the needles right now. One pair is done using intarsia and I hope to get lots of technique photos and info for the blog.

Lately DH and I have been fantasizing about moving to remote Jemez Springs. It is about as far away from his job as our house now in the other direction and he'd get to avoid driving in the big city altogether. Jemez Springs is about halfway between Rio Rancho and Los Alamos and is notorious for a now closed treatment center for priests.

I think it is the 2nd most beautiful place in NM I've seen (My #1 choice is Taos Ski Valley) and certainly the most colorful. The red rocks are the reddest I've ever seen. Here's the view across from the Walatowa Visitor Center on the Jemez Pueblo. I was really rushing to get photos but next time I'll get some photos of the Pueblo itself and all the hornos (outdoor clay ovens) in the yards for baking bread. The Jemez Pueblo is also famous for some very colorful pottery.


Here is the Jemez Springs bath house. The town also boasts 3 or 4 funky restaurants, a Zen Buddhist center, and some art galleries. Although there is a nearby winery and even an alpaca ranch the nearest grocery store is 30 miles away.


Here is main street. The town has around 375 residents with an alternative vibe and reminds me a bit of either Madrid, New Mexico or Dolores, Colorado. It even has a little river running through it.


Recreational opportunities abound and DH would be in heaven hiking and cross-country skiing. There's even a nearby alpine lake (a rarity in NM). This photo is the Valles Caldera National Preserve north of Jemez Springs - it is a massive collapsed volcanic crater.

A Little Preview


The fairy colorways for tomorrow's 6 p.m. SockPixie update are almot ready. I had so much fun designing them. I find them incredibly refreshing, and cheerful. They are like a ray of sunshine in the midst of my New England winter. There is nothing like fairy dust to bring magic to life!
The picture above is one of this week's colorways and is called Narcissus Fairy. It was inspired by the fairy of the same name.
I hope you enjoy this Sunday's colors as much as I enjoyed creating them!

After the Magic Slippers, some Magic Colors


This week I wanted magic. Magic was all I could think about. I knit the Magic Slippers. They made me so happy. They put me in the mood for more magic, and so I chose to have a week of Flower Fairy Colorways. All my colorways this week will be inspired by the vintage illustrations of Cecily Mary Barker, and will updated on the SockPixie site on Sunday at 6 p.m Eastern Time.
What could be more appropriate for me, the SockPixie!